Best RemoteIoT Web SSH Raspberry Pi: Your Ultimate Guide To Secure And Efficient Remote Access
Ever wondered how to set up the best remote IoT web SSH Raspberry Pi system? Well, buckle up because we’re diving deep into the world of remote access, security, and efficiency. Whether you’re a tech enthusiast, a hobbyist, or a professional looking to streamline your IoT projects, this guide has got you covered. From setting up your Raspberry Pi to securing your SSH connections, we’ll walk you through every step of the process.
Remote access to your IoT devices is no longer a luxury—it’s a necessity. With more people working from home and managing projects remotely, having a reliable setup for accessing your Raspberry Pi via SSH is crucial. But it’s not just about convenience; it’s about security, performance, and peace of mind.
In this article, we’ll explore everything you need to know about creating the best remote IoT web SSH Raspberry Pi setup. We’ll cover the basics, advanced configurations, troubleshooting tips, and even some cool hacks to make your life easier. So grab your coffee, fire up your Raspberry Pi, and let’s get started!
Read also:What Happened To Chuck Todd The Inside Scoop Yoursquove Been Waiting For
Before we dive into the nitty-gritty, here’s a quick overview of what we’ll be discussing:
- What is RemoteIoT and Why Does It Matter?
- Setting Up Your Raspberry Pi for Remote Access
- Configuring SSH for Maximum Security
- Creating a Web-Based SSH Interface
- Best Practices for Remote IoT Management
- Troubleshooting Common Issues
What is RemoteIoT and Why Does It Matter?
Let’s start with the basics. RemoteIoT refers to the practice of managing and controlling Internet of Things (IoT) devices from a remote location. This can include anything from home automation systems to industrial sensors and beyond. The ability to access these devices remotely is essential for monitoring, troubleshooting, and maintaining them without being physically present.
Now, why does it matter? In today’s fast-paced world, time is money. Being able to manage your IoT devices from anywhere in the world saves you time, reduces downtime, and increases productivity. Plus, it opens up new possibilities for innovation and scalability in your projects.
And that’s where the Raspberry Pi comes in. This tiny yet powerful device is perfect for IoT applications, thanks to its affordability, flexibility, and community support. Combine it with SSH (Secure Shell), and you’ve got a secure and efficient way to access and manage your IoT devices remotely.
Setting Up Your Raspberry Pi for Remote Access
Before you can dive into the world of remote IoT web SSH Raspberry Pi, you need to set up your Raspberry Pi properly. Here’s a step-by-step guide to get you started:
Step 1: Install the Operating System
First things first, you’ll need to install an operating system on your Raspberry Pi. The most popular choice is Raspberry Pi OS, which comes with everything you need to get started. Simply download the image, write it to an SD card using a tool like Balena Etcher, and insert it into your Raspberry Pi.
Read also:Lara Rose Ofleaks The Untold Story You Need To Know
Step 2: Enable SSH
SSH is disabled by default on Raspberry Pi OS for security reasons. To enable it, you’ll need to create an empty file named “ssh” (without any extension) in the boot partition of your SD card. Once you boot your Raspberry Pi, SSH will be enabled automatically.
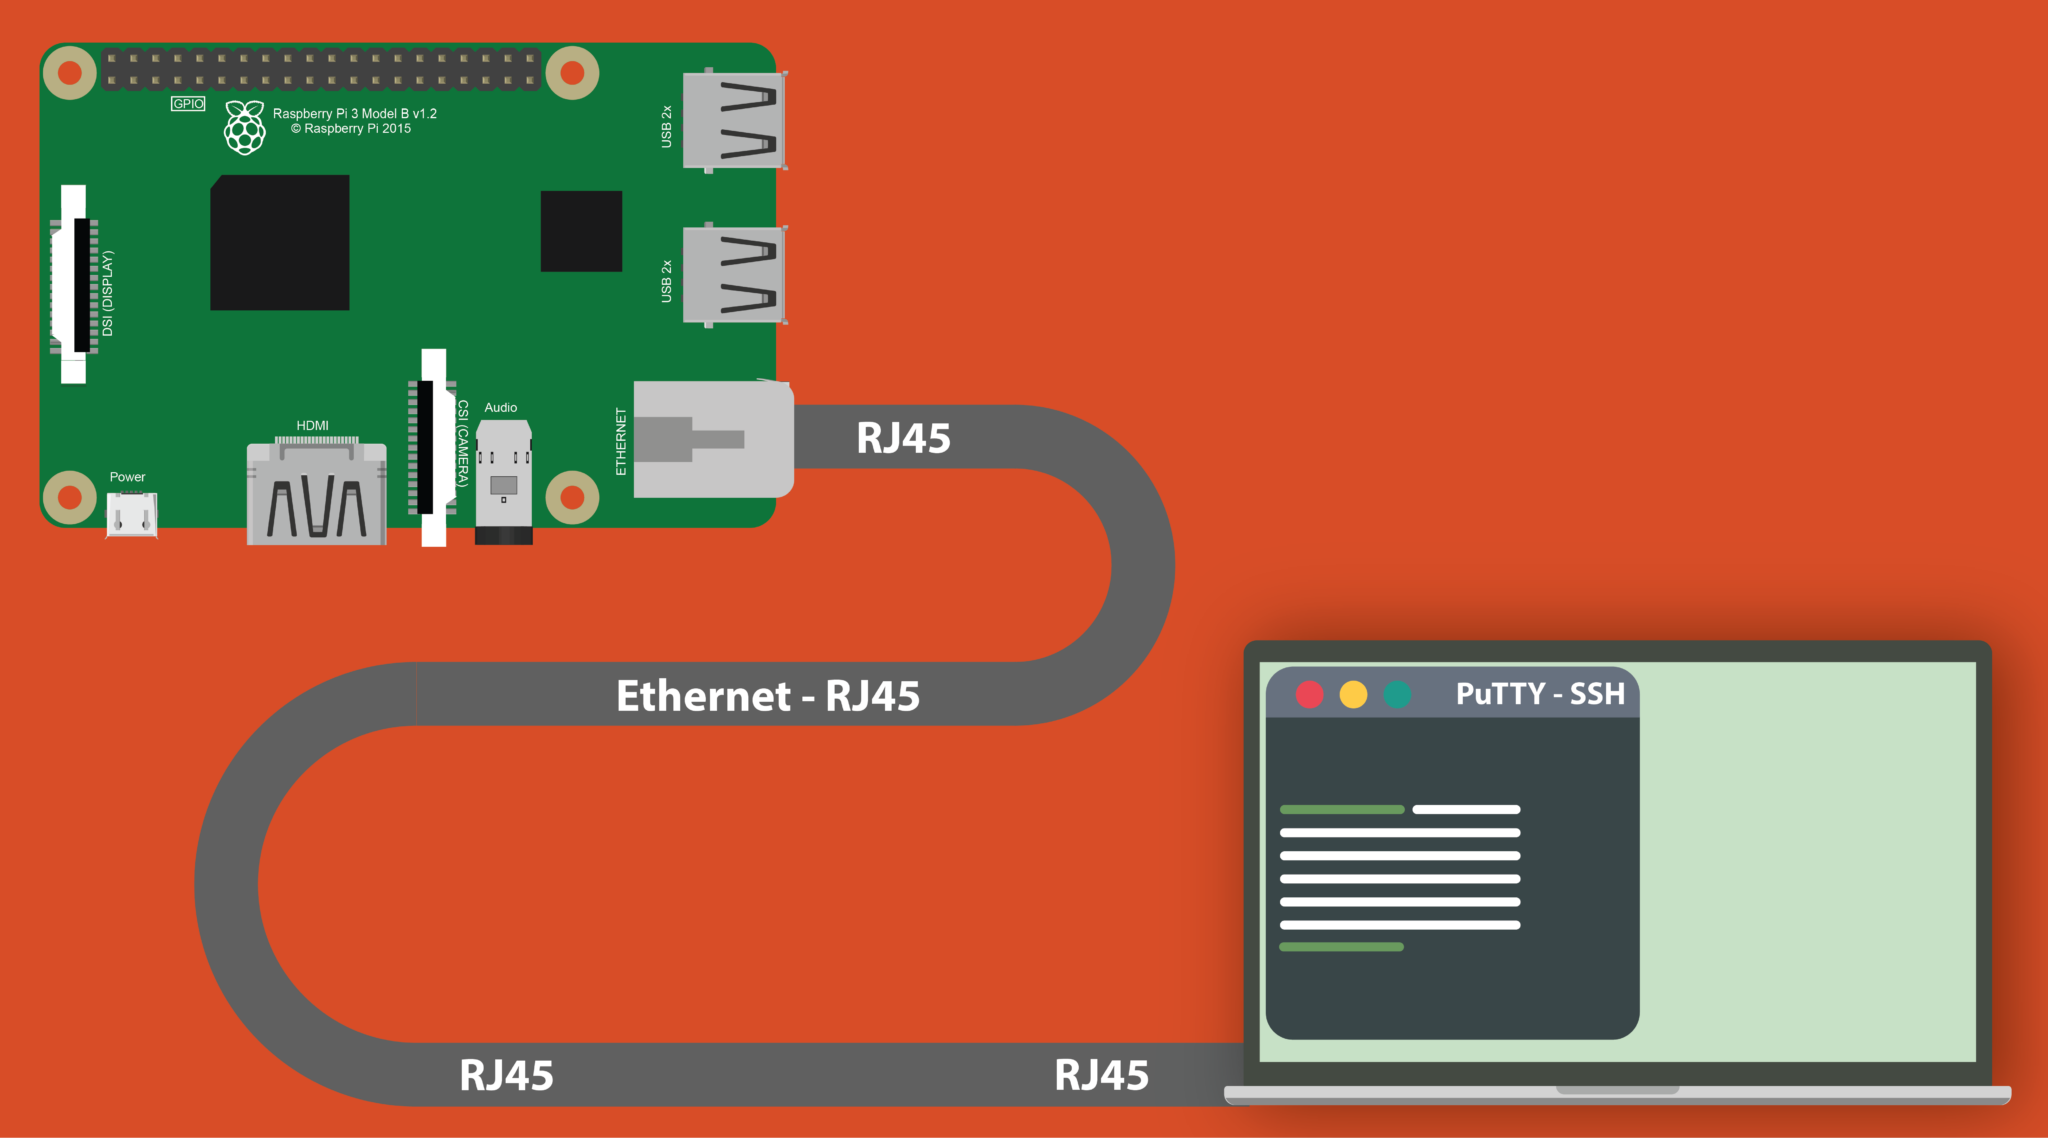
Step 3: Connect to Your Network
To access your Raspberry Pi remotely, it needs to be connected to your local network. You can do this via Ethernet or Wi-Fi. If you’re using Wi-Fi, make sure to configure the network settings in the “wpa_supplicant.conf” file located in the boot partition.
And that’s it! Your Raspberry Pi is now ready for remote access.
Configuring SSH for Maximum Security
Security is paramount when it comes to remote access. Without proper configuration, your Raspberry Pi could become an easy target for hackers. Here are some tips to secure your SSH setup:
- Change the Default Port: The default SSH port is 22, but changing it to something less common can deter automated attacks.
- Use Key-Based Authentication: Passwords are easy to guess, but SSH keys are much more secure. Generate a key pair using a tool like PuTTY or OpenSSH and configure your Raspberry Pi to accept only key-based authentication.
- Disable Root Login: Allowing root login via SSH is a big no-no. Instead, create a regular user account and use it to log in.
- Set Up a Firewall: Use a tool like UFW (Uncomplicated Firewall) to restrict access to your SSH port only from trusted IP addresses.
By following these best practices, you can significantly reduce the risk of unauthorized access to your Raspberry Pi.
Creating a Web-Based SSH Interface
While SSH is great for command-line enthusiasts, not everyone is comfortable with typing commands in a terminal. That’s where web-based SSH interfaces come in. These tools allow you to access your Raspberry Pi via a web browser, making it easier for non-technical users to manage their IoT devices.
Option 1: WebSSH
WebSSH is a simple and lightweight solution for creating a web-based SSH interface. To install it, you’ll need to have Node.js and npm (Node Package Manager) installed on your Raspberry Pi. Once you’ve installed WebSSH, you can access it by navigating to the specified URL in your browser.
Option 2: Shellinabox
Shellinabox is another popular choice for web-based SSH access. It’s easy to install and configure, and it supports multiple sessions, making it ideal for collaborative projects. Simply install it using the package manager of your choice and configure it to suit your needs.
Both options have their pros and cons, so choose the one that best fits your requirements.
Best Practices for Remote IoT Management
Now that you’ve set up your Raspberry Pi for remote access, it’s time to talk about best practices for managing your IoT devices. Here are some tips to keep in mind:
- Regularly Update Your Software: Keeping your operating system and applications up to date is crucial for security and performance.
- Monitor Resource Usage: IoT devices can be resource-intensive, so it’s important to keep an eye on CPU, memory, and disk usage.
- Backup Your Data: Always have a backup plan in case something goes wrong. Regularly back up your important files and configurations.
- Document Your Setup: Keeping a detailed record of your setup can save you a lot of time and trouble in the future.
By following these best practices, you can ensure that your IoT projects run smoothly and securely.
Troubleshooting Common Issues
Even the best-laid plans can go awry sometimes. Here are some common issues you might encounter when setting up your remote IoT web SSH Raspberry Pi system and how to fix them:
Issue 1: Unable to Connect via SSH
If you’re unable to connect to your Raspberry Pi via SSH, check the following:
- Is SSH enabled on your Raspberry Pi?
- Are you using the correct IP address and port?
- Are there any firewall rules blocking your connection?
Issue 2: Slow Performance
If your Raspberry Pi is running slowly, try the following:
- Check for resource-intensive processes and terminate them if necessary.
- Optimize your applications for better performance.
- Consider upgrading your hardware if the issue persists.
With these troubleshooting tips, you should be able to resolve most common issues quickly and efficiently.
Advanced Configurations for Power Users
If you’re looking to take your remote IoT web SSH Raspberry Pi setup to the next level, here are some advanced configurations you might consider:
Setting Up a Dynamic DNS
Dynamic DNS allows you to access your Raspberry Pi using a domain name instead of an IP address. This is especially useful if your ISP assigns a dynamic IP address to your router.
Configuring Port Forwarding
Port forwarding allows you to access your Raspberry Pi from outside your local network. Be sure to configure your router settings carefully to avoid security risks.
These advanced configurations can give you more flexibility and control over your remote IoT setup.
Real-World Applications of RemoteIoT Web SSH Raspberry Pi
Now that you know how to set up and configure your Raspberry Pi for remote access, let’s explore some real-world applications:
- Home Automation: Control your smart home devices from anywhere in the world.
- Remote Monitoring: Keep an eye on your industrial equipment or environmental sensors in real-time.
- Collaborative Projects: Work with team members on IoT projects without being in the same location.
The possibilities are endless, and the best part is that you’re in control.
Conclusion
Setting up the best remote IoT web SSH Raspberry Pi system might seem daunting at first, but with the right guidance, it’s definitely achievable. From configuring SSH for maximum security to creating a web-based interface for easy access, this guide has covered everything you need to know.
Remember, the key to success is staying informed and following best practices. Regularly update your software, monitor your resources, and document your setup to ensure smooth sailing.
So, what are you waiting for? Dive into the world of remote IoT and see what you can achieve. And don’t forget to share your experiences and tips in the comments below. Happy tinkering!
Article Recommendations